Evidence for “What is nerve transfer surgery?” is based on:
Ahuja, C. S., Wilson, J. R., Nori, S., Kotter, M. R. N., Druschel, C., Curt, A., & Fehlings, M. G. (2017). Traumatic spinal cord injury. Nature Reviews Disease Primers, 3(1), 17018. https://doi.org/10.1038/nrdp.2017.18
Hill, E. J. R., & Fox, I. K. (2019). Current Best Peripheral Nerve Transfers for Spinal Cord Injury. Plastic & Reconstructive Surgery, 143(1), 184e–198e. https://doi.org/10.1097/PRS.0000000000005173
Evidence for “What can nerve transfers help with?” is based on:
Mahar, M., & Cavalli, V. (2018). Intrinsic mechanisms of neuronal axon regeneration. Nature Reviews Neuroscience, 19(6), 323–337. https://doi.org/10.1038/s41583-018-0001-8
Bazarek, S., & Brown, J. M. (2020). The evolution of nerve transfers for spinal cord injury. Experimental Neurology, 333, 113426. https://doi.org/10.1016/j.expneurol.2020.113426
Bunketorp-Käll, L., Reinholdt, C., Fridén, J., & Wangdell, J. (2017). Essential gains and health after upper-limb tetraplegia surgery identified by the International classification of functioning, disability and health (ICF). Spinal Cord, 55(9), 857–863. https://doi.org/10.1038/sc.2017.36
Evidence for Table 1 is based on:
Bazarek, S., & Brown, J. M. (2020). The evolution of nerve transfers for spinal cord injury. Experimental Neurology, 333, 113426. https://doi.org/10.1016/j.expneurol.2020.113426
Galea, M., Messina, A., Hill, B., Cooper, C., Hahn, J., & van Zyl, N. (2020). Reanimating hand function after spinal cord injury using nerve transfer surgery. Advances in Clinical Neuroscience & Rehabilitation, 20(2), 17–19. https://doi.org/10.47795/CQZF2655
Evidence for “Who is suitable for a nerve transfer?” is based on:
Khalifeh, J. M., Dibble, C. F., Van Voorhis, A., Doering, M., Boyer, M. I., Mahan, M. A., Wilson, T. J., Midha, R., Yang, L. J. S., & Ray, W. Z. (2019a). Nerve transfers in the upper extremity following cervical spinal cord injury. Part 1: Systematic review of the literature. Journal of Neurosurgery: Spine, 31(5), 629–640. https://doi.org/10.3171/2019.4.SPINE19173
Dengler, J., Mehra, M., Steeves, J. D., Fox, I. K., Curt, A., Maier, D., Abel, R., Weidner, N., Rupp, R., Vidal, J., Benito, J., Kalke, Y.-B., Curtin, C., Kennedy, C., Miller, A., Novak, C., Ota, D., & Stenson, K. C. (2021). Evaluation of Functional Independence in Cervical Spinal Cord Injury: Implications for Surgery to Restore Upper Limb Function. The Journal of Hand Surgery, 46(7), 621.e1-621.e17. https://doi.org/10.1016/j.jhsa.2020.10.036
Kirshblum, S. C., Burns, S. P., Biering-Sorensen, F., Donovan, W., Graves, D. E., Jha, A., Johansen, M., Jones, L., Krassioukov, A., Mulcahey, M. J., Schmidt-Read, M., & Waring, W. (2011). International standards for neurological classification of spinal cord injury (Revised 2011). The Journal of Spinal Cord Medicine, 34(6), 535–546. https://doi.org/10.1179/204577211X13207446293695
Javeed, S., Dibble, C. F., Greenberg, J. K., Zhang, J. K., Khalifeh, J. M., Park, Y., Wilson, T. J., Zager, E. L., Faraji, A. H., Mahan, M. A., Yang, L. J., Midha, R., Juknis, N., & Ray, W. Z. (2022). Upper Limb Nerve Transfer Surgery in Patients With Tetraplegia. JAMA Netw Open, 5(11), e2243890-. https://doi.org/10.1001/jamanetworkopen.2022.43890
Khalifeh, J. M., Dibble, C. F., Van Voorhis, A., Doering, M., Boyer, M. I., Mahan, M. A., Wilson, T. J., Midha, R., Yang, L. J. S., & Ray, W. Z. (2019b). Nerve transfers in the upper extremity following cervical spinal cord injury. Part 2: Preliminary results of a prospective clinical trial. Journal of Neurosurgery: Spine, 31(5). https://doi.org/10.3171/2019.4.SPINE19399
van Zyl, N., Hill, B., Cooper, C., Hahn, J., & Galea, M. P. (2019). Expanding traditional tendon-based techniques with nerve transfers for the restoration of upper limb function in tetraplegia: a prospective case series. Lancet, 394(10198), 565–575. https://doi.org/10.1016/S0140-6736(19)31143-2
Stanley, E. A., Hill, B., McKenzie, D. P., Chapuis, P., Galea, M. P., & N, van Z. (2022). Predicting strength outcomes for upper limb nerve transfer surgery in tetraplegia. J Hand Surg Eur Vol, 47(11), 1114–1120. https://doi.org/10.1177/17531934221113739
Berger, M. J., Dengler, J., Westman, A., Curt, A., Schubert, M., Abel, R., Weidner, N., Röhrich, F., & Fox, I. K. (2023). Nerve transfer after cervical spinal cord injury: Who has a “time sensitive” injury based on electrodiagnostic findings? Archives of Physical Medicine and Rehabilitation. https://doi.org/10.1016/j.apmr.2023.11.003
Bryden, A. M., Hoyen, H. A., Keith, M. W., Mejia, M., Kilgore, K. L., & Nemunaitis, G. A. (2016). Upper Extremity Assessment in Tetraplegia: The Importance of Differentiating Between Upper and Lower Motor Neuron Paralysis. Archives of Physical Medicine and Rehabilitation, 97(6), S97–S104. https://doi.org/10.1016/j.apmr.2015.11.021
Castanov, V., Berger, M., Ritsma, B., Trier, J., & Hendry, J. M. (2021). Optimizing the Timing of Peripheral Nerve Transfers for Functional Re-Animation in Cervical Spinal Cord Injury: A Conceptual Framework. Journal of Neurotrauma, 38(24), 3365–3375. https://doi.org/10.1089/neu.2021.0247
Hill, E. J. R., & Fox, I. K. (2019). Current Best Peripheral Nerve Transfers for Spinal Cord Injury. Plastic & Reconstructive Surgery, 143(1), 184e–198e. https://doi.org/10.1097/PRS.0000000000005173
Jain, N. S., Hill, E. J. R., Zaidman, C. M., Novak, C. B., Hunter, D. A., Juknis, N., Ruvinskaya, R., Kennedy, C. R., Vetter, J., Mackinnon, S. E., & Fox, I. K. (2020). Evaluation for Late Nerve Transfer Surgery in Spinal Cord Injury: Predicting the Degree of Lower Motor Neuron Injury. J Hand Surg Am, 45(2), 95–103. https://doi.org/10.1016/j.jhsa.2019.11.003
Fox, I. K., Novak, C. B., Krauss, E. M., Hoben, G. M., Zaidman, C. M., Ruvinskaya, R., Juknis, N., Winter, A. C., & Mackinnon, S. E. (2018). The Use of Nerve Transfers to Restore Upper Extremity Function in Cervical Spinal Cord Injury. PM&R, 10(11), 1173. https://doi.org/10.1016/j.pmrj.2018.03.013
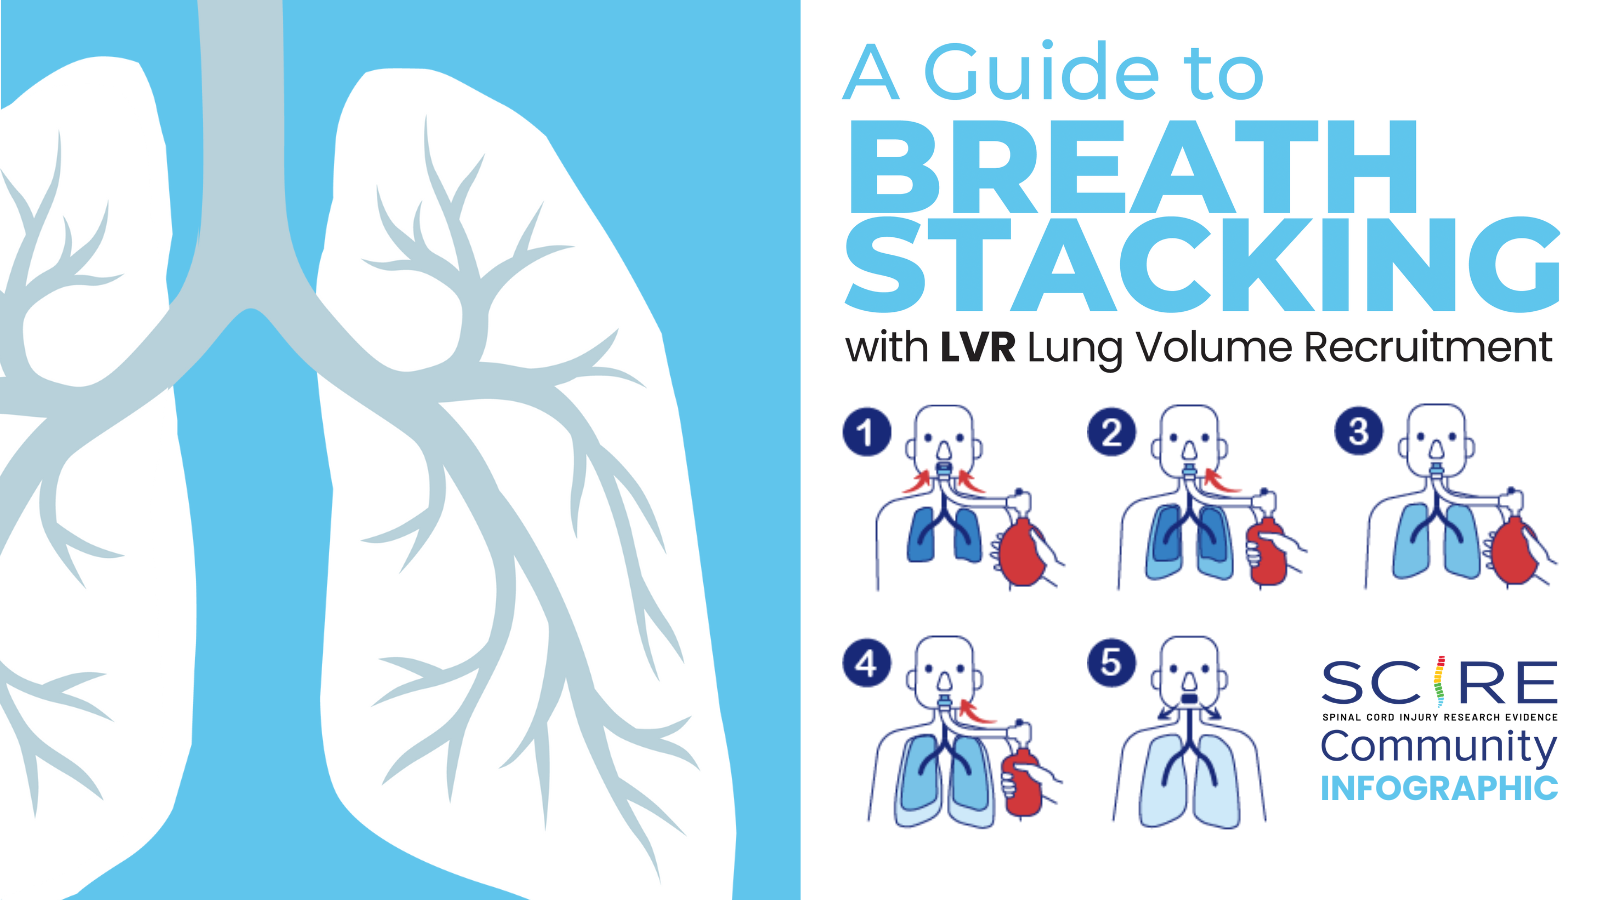
Evidence for “What is the process for a nerve transfer?” is based on:
Dengler, J., Steeves, J. D., Curt, A., Mehra, M., Novak, C. B., & Fox, I. K. (2022). Spontaneous Motor Recovery after Cervical Spinal Cord Injury: Issues for Nerve Transfer Surgery Decision Making. Spinal Cord, 60(10), 922–927. https://doi.org/10.1038/s41393-022-00834-6
Hill, E. J. R., & Fox, I. K. (2019). Current Best Peripheral Nerve Transfers for Spinal Cord Injury. Plastic & Reconstructive Surgery, 143(1), 184e–198e. https://doi.org/10.1097/PRS.0000000000005173
Kane, N. M., & Oware, A. (2012). Nerve conduction and electromyography studies. Journal of Neurology, 259(7), 1502–1508. https://doi.org/10.1007/s00415-012-6497-3
Berger, M. J., Dengler, J., Westman, A., Curt, A., Schubert, M., Abel, R., Weidner, N., Röhrich, F., & Fox, I. K. (2023). Nerve transfer after cervical spinal cord injury: Who has a “time sensitive” injury based on electrodiagnostic findings? Archives of Physical Medicine and Rehabilitation. https://doi.org/10.1016/j.apmr.2023.11.003
Bersch, I., & Fridén, J. (2020). Upper and lower motor neuron lesions in tetraplegia: implications for surgical nerve transfer to restore hand function. J Appl Physiol (1985), 129(5), 1214–1219. https://doi.org/10.1152/japplphysiol.00529.2020
van Zyl, N., Hill, B., Cooper, C., Hahn, J., & Galea, M. P. (2019). Expanding traditional tendon-based techniques with nerve transfers for the restoration of upper limb function in tetraplegia: a prospective case series. Lancet, 394(10198), 565–575. https://doi.org/10.1016/S0140-6736(19)31143-2
Fox, I. K., Miller, A. K., & Curtin, C. M. (2018). Nerve and Tendon Transfer Surgery in Cervical Spinal Cord Injury: Individualized Choices to Optimize Function. Topics in Spinal Cord Injury Rehabilitation, 24(3), 275–287. https://doi.org/10.1310/sci2403-275
Kahn, L. C., Evans, A. G., Hill, E. J. R., & Fox, I. K. (2022). Donor activation focused rehabilitation approach to hand closing nerve transfer surgery in individuals with cervical level spinal cord injury. Spinal Cord Ser Cases, 8(1), 47. https://doi.org/10.1038/s41394-022-00512-y
Aguirre-Güemez, A. V, Mendoza-Muñoz, M., Jiménez-Coello, G., Rhoades-Torres, G. M., Pérez-Zavala, R., Barrera-Ortíz, A., & Quinzaños-Fresnedo, J. (2021). Nerve transfer rehabilitation in tetraplegia: Comprehensive assessment and treatment program to improve upper extremity function before and after nerve transfer surgery, a case report. J Spinal Cord Med, 44(4), 621–626. https://doi.org/10.1080/10790268.2019.1660841
Javeed, S., Dibble, C. F., Greenberg, J. K., Zhang, J. K., Khalifeh, J. M., Park, Y., Wilson, T. J., Zager, E. L., Faraji, A. H., Mahan, M. A., Yang, L. J., Midha, R., Juknis, N., & Ray, W. Z. (2022). Upper Limb Nerve Transfer Surgery in Patients With Tetraplegia. JAMA Netw Open, 5(11), e2243890-. https://doi.org/10.1001/jamanetworkopen.2022.43890
Larocerie-Salgado, J., Chinchalkar, S., Ross, D. C., Gillis, J., Doherty, C. D., & Miller, T. A. (2022). Rehabilitation Following Nerve Transfer Surgery. Techniques in Hand & Upper Extremity Surgery, 26(2), 71–77. https://doi.org/10.1097/BTH.0000000000000359
Opsommer, E., Chevalley, O., & Korogod, N. (2020). Motor imagery for pain and motor function after spinal cord injury: a systematic review. Spinal Cord, 58(3), 262–274. https://doi.org/10.1038/s41393-019-0390-1
Evidence for “How do nerve transfers compare to tendon transfers?” is based on:
Bazarek, S., & Brown, J. M. (2020). The evolution of nerve transfers for spinal cord injury. Experimental Neurology, 333, 113426. https://doi.org/10.1016/j.expneurol.2020.113426
van Zyl, N., Hill, B., Cooper, C., Hahn, J., & Galea, M. P. (2019). Expanding traditional tendon-based techniques with nerve transfers for the restoration of upper limb function in tetraplegia: a prospective case series. Lancet, 394(10198), 565–575. https://doi.org/10.1016/S0140-6736(19)31143-2
Evidence for Table 2 is based on:
van Zyl, N., Hill, B., Cooper, C., Hahn, J., & Galea, M. P. (2019). Expanding traditional tendon-based techniques with nerve transfers for the restoration of upper limb function in tetraplegia: a prospective case series. Lancet, 394(10198), 565–575. https://doi.org/10.1016/S0140-6736(19)31143-2
Aguirre-Güemez, A. V, Mendoza-Muñoz, M., Jiménez-Coello, G., Rhoades-Torres, G. M., Pérez-Zavala, R., Barrera-Ortíz, A., & Quinzaños-Fresnedo, J. (2021). Nerve transfer rehabilitation in tetraplegia: Comprehensive assessment and treatment program to improve upper extremity function before and after nerve transfer surgery, a case report. J Spinal Cord Med, 44(4), 621–626. https://doi.org/10.1080/10790268.2019.1660841
Kahn, L. C., Evans, A. G., Hill, E. J. R., & Fox, I. K. (2022). Donor activation focused rehabilitation approach to hand closing nerve transfer surgery in individuals with cervical level spinal cord injury. Spinal Cord Ser Cases, 8(1), 47. https://doi.org/10.1038/s41394-022-00512-y
Bunketorp-Käll, L., Reinholdt, C., Fridén, J., & Wangdell, J. (2017). Essential gains and health after upper-limb tetraplegia surgery identified by the International classification of functioning, disability and health (ICF). Spinal Cord, 55(9), 857–863. https://doi.org/10.1038/sc.2017.36
Fox, I. K., Miller, A. K., & Curtin, C. M. (2018). Nerve and Tendon Transfer Surgery in Cervical Spinal Cord Injury: Individualized Choices to Optimize Function. Topics in Spinal Cord Injury Rehabilitation, 24(3), 275–287. https://doi.org/10.1310/sci2403-275
Dunn, J. A., Sinnott, K. A., Rothwell, A. G., Mohammed, K. D., & Simcock, J. W. (2016). Tendon Transfer Surgery for People With Tetraplegia: An Overview. Archives of Physical Medicine and Rehabilitation, 97(6), S75–S80. https://doi.org/10.1016/j.apmr.2016.01.034
Javeed, S., Dibble, C. F., Greenberg, J. K., Zhang, J. K., Khalifeh, J. M., Park, Y., Wilson, T. J., Zager, E. L., Faraji, A. H., Mahan, M. A., Yang, L. J., Midha, R., Juknis, N., & Ray, W. Z. (2022). Upper Limb Nerve Transfer Surgery in Patients With Tetraplegia. JAMA Netw Open, 5(11), e2243890-. https://doi.org/10.1001/jamanetworkopen.2022.43890
Evidence for “What are the risks of nerve transfers?” is based on:
Francoisse, C. A., Russo, S. A., Skladman, R., Kahn, L. C., Kennedy, C., Stenson, K. C., Novak, C. B., & Fox, I. K. (2022). Quantifying Donor Deficits Following Nerve Transfer Surgery in Tetraplegia. J Hand Surg Am, 47(12), 1157–1165. https://doi.org/10.1016/j.jhsa.2022.08.014
van Zyl, N., Hill, B., Cooper, C., Hahn, J., & Galea, M. P. (2019). Expanding traditional tendon-based techniques with nerve transfers for the restoration of upper limb function in tetraplegia: a prospective case series. Lancet, 394(10198), 565–575. https://doi.org/10.1016/S0140-6736(19)31143-2
Bertelli, J. A., & Ghizoni, M. F. (2017). Nerve transfers for restoration of finger flexion in patients with tetraplegia. Journal of Neurosurgery: Spine, 26(1), 55–61. https://doi.org/10.3171/2016.5.SPINE151544
Wilson, T. J. (2019). Novel Uses of Nerve Transfers. Neurotherapeutics, 16(1), 26–35. https://doi.org/10.1007/s13311-018-0664-x Khalifeh, J. M., Dibble, C. F., Van Voorhis, A., Doering, M., Boyer, M. I., Mahan, M. A., Wilson, T. J., Midha, R., Yang, L. J. S., & Ray, W. Z. (2019a). Nerve transfers in the upper extremity following cervical spinal cord injury. Part 1: Systematic review of the literature. Journal of Neurosurgery: Spine, 31(5), 629–640. https://doi.org/10.3171/2019.4.SPINE19173
Mooney, A., Hewitt, A. E., & Hahn, J. (2021). Nothing to lose: a phenomenological study of upper limb nerve transfer surgery for individuals with tetraplegia. Disabil Rehabil, 43(26), 3748–3756. https://doi.org/10.1080/09638288.2020.1750716
Hill, E. J. R., & Fox, I. K. (2019). Current Best Peripheral Nerve Transfers for Spinal Cord Injury. Plastic & Reconstructive Surgery, 143(1), 184e–198e. https://doi.org/10.1097/PRS.0000000000005173
Evidence for “What are the limitations of nerve transfers?” is based on:
Mooney, A., Hewitt, A. E., & Hahn, J. (2021). Nothing to lose: a phenomenological study of upper limb nerve transfer surgery for individuals with tetraplegia. Disabil Rehabil, 43(26), 3748–3756. https://doi.org/10.1080/09638288.2020.1750716
Hill, E. J. R., & Fox, I. K. (2019). Current Best Peripheral Nerve Transfers for Spinal Cord Injury. Plastic & Reconstructive Surgery, 143(1), 184e–198e. https://doi.org/10.1097/PRS.0000000000005173
Heredia Gutiérrez, A., Cachón Cámara, G. E., González Carranza, V., Torres García, S., & Chico Ponce de León, F. (2020). Phrenic nerve neurotization utilizing half of the spinal accessory nerve to the functional restoration of the paralyzed diaphragm in high spinal cord injury secondary to brain tumor resection. Child’s Nervous System, 36(6), 1307–1310. https://doi.org/10.1007/s00381-019-04490-9
Bazarek, S., & Brown, J. M. (2020). The evolution of nerve transfers for spinal cord injury. Experimental Neurology, 333, 113426. https://doi.org/10.1016/j.expneurol.2020.113426
Evidence for “Are nerve transfers effective?” is based on:
Javeed, S., Dibble, C. F., Greenberg, J. K., Zhang, J. K., Khalifeh, J. M., Park, Y., Wilson, T. J., Zager, E. L., Faraji, A. H., Mahan, M. A., Yang, L. J., Midha, R., Juknis, N., & Ray, W. Z. (2022). Upper Limb Nerve Transfer Surgery in Patients With Tetraplegia. JAMA Netw Open, 5(11), e2243890-. https://doi.org/10.1001/jamanetworkopen.2022.43890
Khalifeh, J. M., Dibble, C. F., Van Voorhis, A., Doering, M., Boyer, M. I., Mahan, M. A., Wilson, T. J., Midha, R., Yang, L. J. S., & Ray, W. Z. (2019b). Nerve transfers in the upper extremity following cervical spinal cord injury. Part 2: Preliminary results of a prospective clinical trial. Journal of Neurosurgery: Spine, 31(5). https://doi.org/10.3171/2019.4.SPINE19399
Stanley, E. A., Hill, B., McKenzie, D. P., Chapuis, P., Galea, M. P., & N, van Z. (2022). Predicting strength outcomes for upper limb nerve transfer surgery in tetraplegia. J Hand Surg Eur Vol, 47(11), 1114–1120. https://doi.org/10.1177/17531934221113739
van Zyl, N., Hill, B., Cooper, C., Hahn, J., & Galea, M. P. (2019). Expanding traditional tendon-based techniques with nerve transfers for the restoration of upper limb function in tetraplegia: a prospective case series. Lancet, 394(10198), 565–575. https://doi.org/10.1016/S0140-6736(19)31143-2
Image credits
- Nerve Transfer by SCIRE
- Elbow Extension by SCIRE
- Wrist Extension by SCIRE
- Finger Extension by SCIRE
- Finger Flexion and Pinch by SCIRE
- Nerve and Tendon Transfers to Improve Upper Limb Function in Cervical Spinal Cord Injury (video)
- Nerve Transfer Level of Injury by SCIRE
- Time Sensitive Nerve Transfers by SCIRE
- Nerve Transfer Timeline by SCIRE
- Tendon Transfer by SCIRE
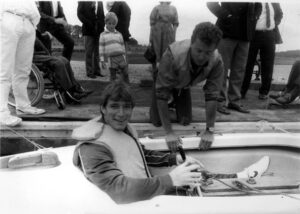
- Photo provided by participant (Caleb)
- Photo provided by participant (Ainsley)
- Photo provided by participant (Dan)

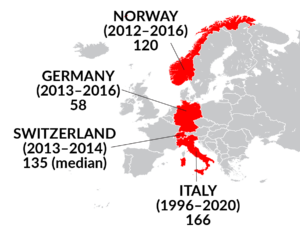
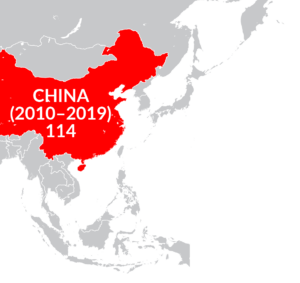
 The LOS for SCI rehabilitation varies significantly between countries due to differences in healthcare systems, insurance models, resource availability, economic factors, cultural and social factors, and adaptation of evidence-based rehabilitation practices. These factors are discussed in detail in the next sections.
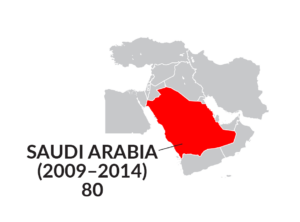
 Australia (2010 – 2011)
 The evidence for how LOS affects individual functional improvement at discharge is mixed. Some studies report a longer LOS is associated with increased functional improvement while others report the opposite.
 Primary care providers (PCPs) take care of the day-to-day health of people at all stages of life. They are often the first contact when someone has a non-emergency health concern. This person is often a family doctor, but the role can also be filled by a nurse practitioner, physician assistant. They play a central role in the care team for people with spinal cord injury (SCI) and you will maintain a relationship with your PCP for many years. The responsibilities of a PCP include:
 Go to the emergency room or call your regional emergency number if…


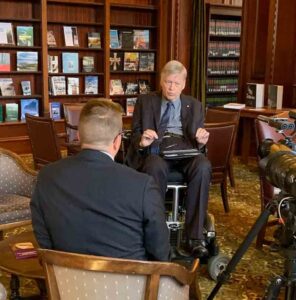
 If your PCP is interested in more in-depth information, case studies, advice, and guidelines for these checklists and SCI-specific care, they can check out the
 Employment
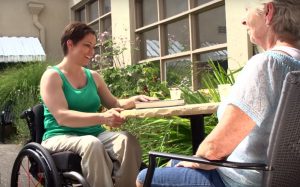
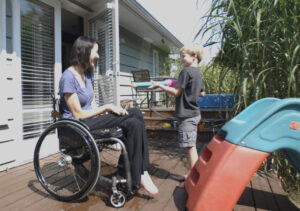 Social support refers to one’s relationships with other people, and the interactions, support, and care provided by this network of people, including family members, friends, and peer community. There is consistent evidence that more social support is linked to higher QoL in people with SCI.
 I was skiing when I broke my neck. I had just turned 19, living in Vancouver. I went on a run that was steep and ended up going quite fast and then crashing. Somewhere in the whole thing I felt my neck break. I experienced it as feeling my body was expanding, the size of the universe. I experienced it as a sound like multiple sirens going off, very loud noises going very broadly. Then, I experienced my body going into a fetal position but when I opened my eyes my arms were up here. I said to myself, “You broke your neck – don’t move.” Eventually, people went down and got a piece of plywood to carry me off the mountain. They took me down, sort of bouncing, which is probably where more damage came.
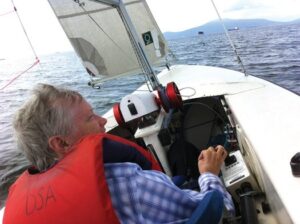
 So then, we went into sailing through
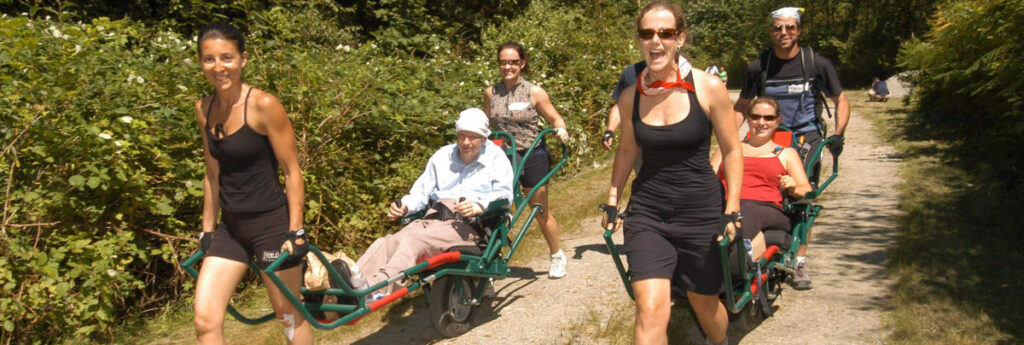

 We were able to put on the Public Salons for about four or five years, having received a million dollars from a foundation in California. We tried to raise additional money to bolster that, but eventually we ran out. We had to try to make it profitable on its own, but it wasn’t designed for fundraising, it was designed for giving me pleasure. Fundraising would be a real challenge. So, we had to totally revolutionize it a couple years ago. What I do now is bring in an international speaker, that’s the star, and then have local responders who give them questions, comments, critiques, etc. So that’s the new model and it seems to be working. I brought in a former chief planner of the World Bank, Alain Bertaud, and a recent Think-Tank Salon included experts on addiction and mental health. In a way, I’m still on those two issues of prices and addiction, now attacking them from outside, not from the inside as mayor.
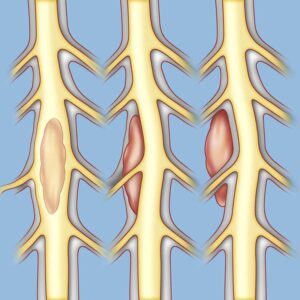
 Congenital NTSCIs are developmental defects, malformations, and abnormalities affecting the spinal cord which are present at birth. An infant can have one congenital condition, or multiple conditions at the same time. For example, Type 2 Chiari malformations almost always occurs in association with myelomeningocele, a severe form of spina bifida
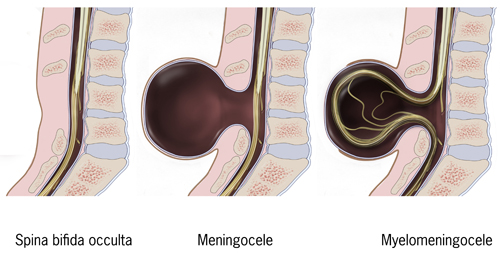

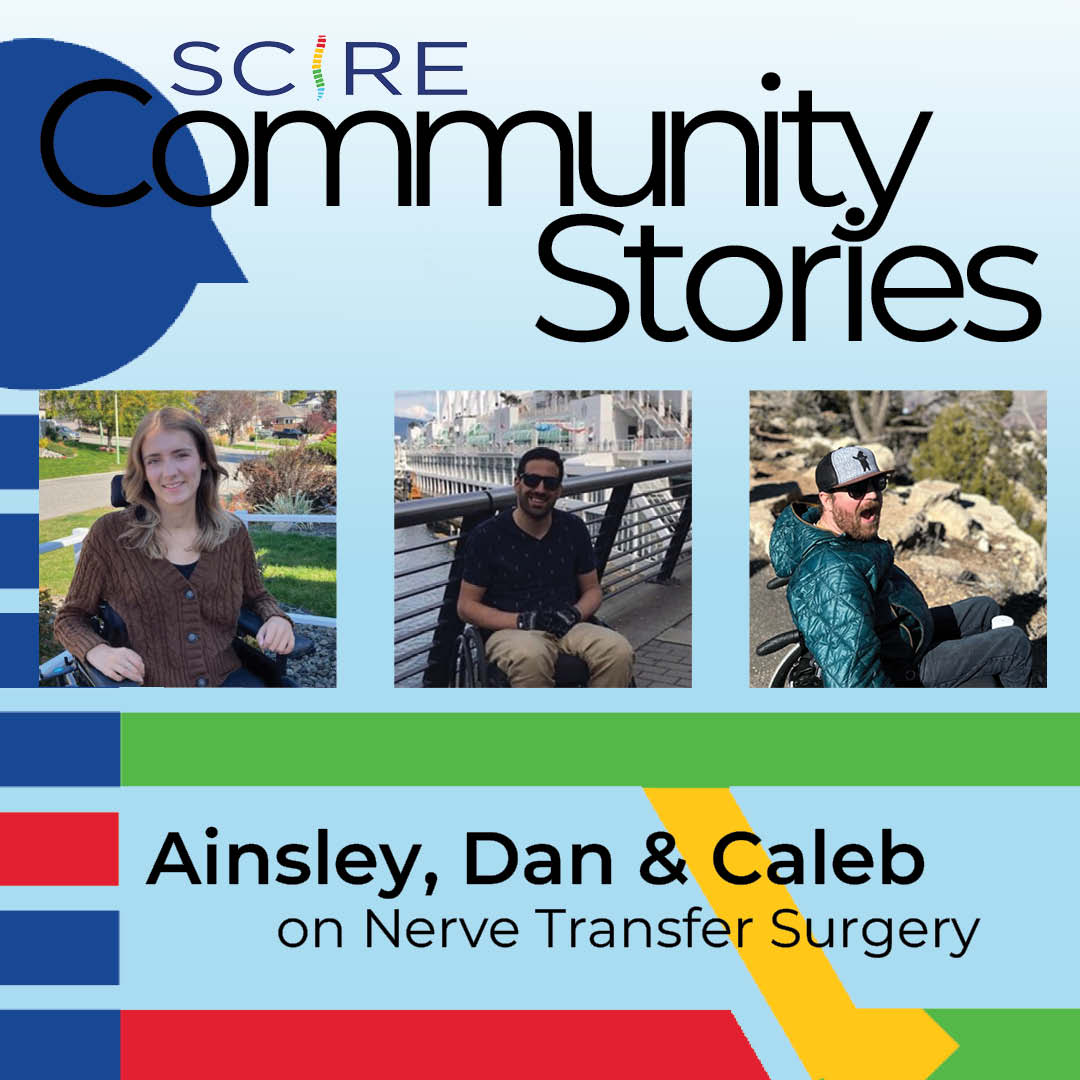
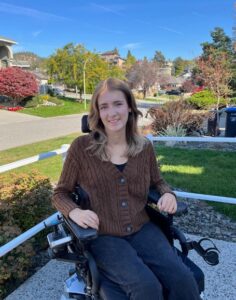
 Ainsley is 17 and plans on doing a Bachelor of Arts at the University of British Columbia after graduating high school this year!
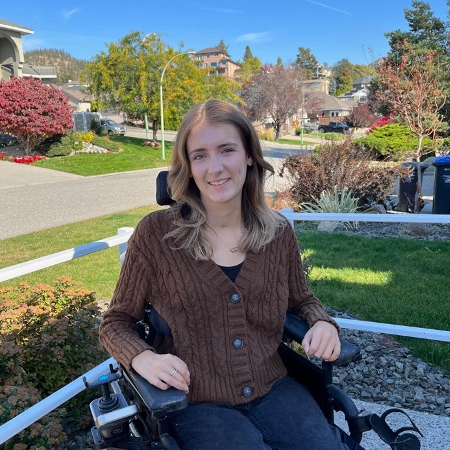
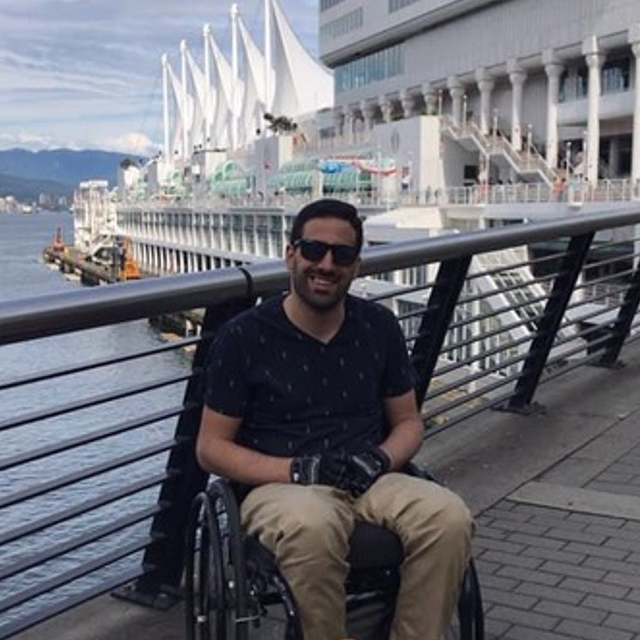 Dan is 37 and a full-time student at Douglas College in Recreation Therapy! He enjoys cooking and has a dog.
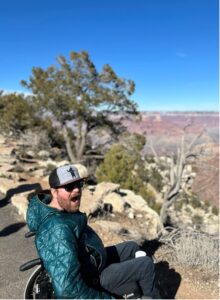
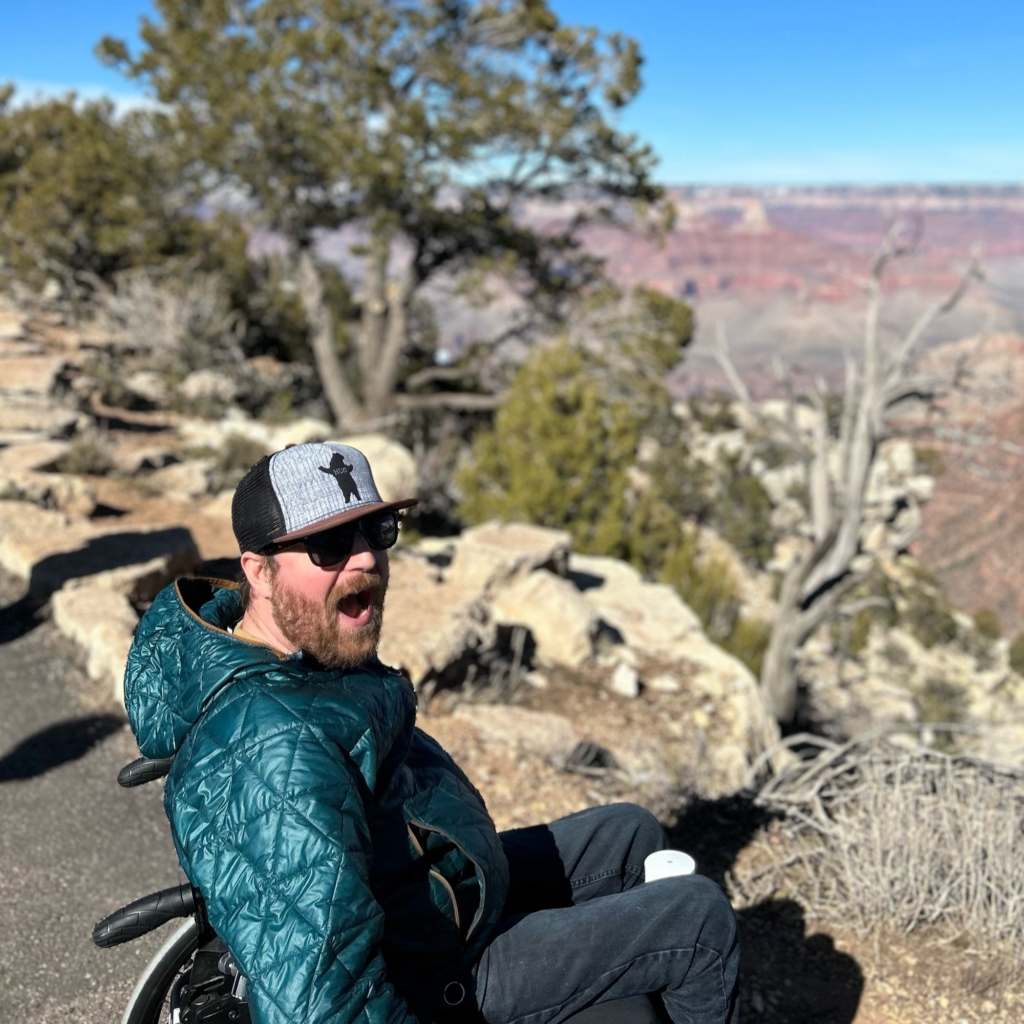 Caleb is 35 and likes to spend his time outdoors and doing sports like scuba diving, whitewater kayaking and sitskiing!
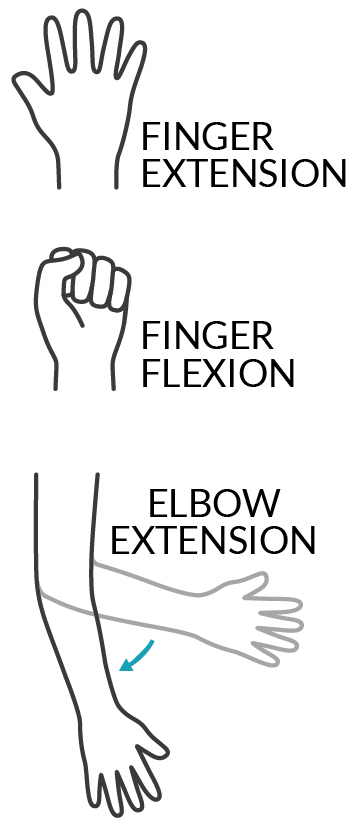
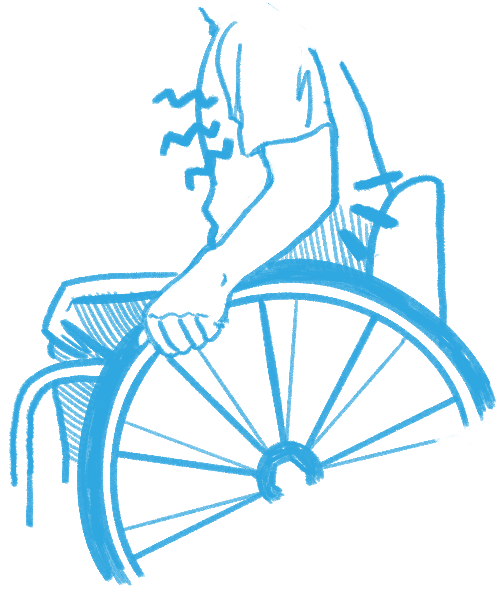 This was very true for Dan. After his nerve transfer surgery, he lost some muscle strength in his left hand and arm. He was still strong enough to push his chair but not to stop. As a result, he went from strictly using a manual chair to using a power wheelchair for about 10 months. The rest of Dan’s recovery did not go so smoothly either. He explains, “in my left arm, when I moved my arm in a certain way, I would get a twang. It felt like I hit my funny bone but times 100. It was really bad and that lasted about two weeks. I also had some numbness in my left thumb all the way down to my palm. I still have numbness but it’s mostly the tip of my thumb so it’s better.” On top of everything, Dan was living at home and not at a rehabilitation centre when he had his surgeries. He came to realize post-surgery that he did not have all the necessary supports in place to accommodate the temporary losses in function. Reflecting on these struggles, he suspects that since people with chronic SCI don’t get nerve transfers often, there is less awareness of how much the surgery can affect their functional abilities.
 Ainsley is now 2 years after the nerve transfers and has gained the ability to fully open both hands. On the left, her restored hand closing from nerve transfer is very strong and she can pick things up. The right-hand pinch gained from the tendon transfer is functional and continues to build strength. All these improvements in her fingers and hands mean that Ainsley can use her cell phone with finger gestures, scratch an itch, adjust her hair, and hold and use things like cutlery, a toothbrush, makeup, and bank cards. The triceps nerve transfer has recovered to the point where she can now extend both arms against gravity. These days, Ainsley is getting ready to hit the road in a custom hand control vehicle, something that would not have been possible if not for the triceps surgeries that improved her strength enough to turn a steering wheel. Hopeful for the future, Ainsley says that she is “still improving everyday”.
 Dan is coming up on 3 years after the nerve transfers. Although his grip is not strong, it is strong enough that he can use and squeeze the brakes on the new e-bike attachment for his wheelchair, which he would not have been able to do without the nerve transfer. Being able to extend his fingers has made it much easier to open his hand to grasp things and move them around. He has more function in his hands then before, but he still has not recovered some of the strength he lost after the surgeries. Dan described how “Before the surgery I could lift a full backpack of groceries off of the back of my chair now I have difficulty if there’s any weight in my bag.” That said, he is still waiting to see how much he improves, explaining, “…it’s coming, it’s just not there yet. I think they say the plateau is four years for this surgery…”, referencing experts who say that improvements for nerve transfers typically reach their peak at around 4 years.
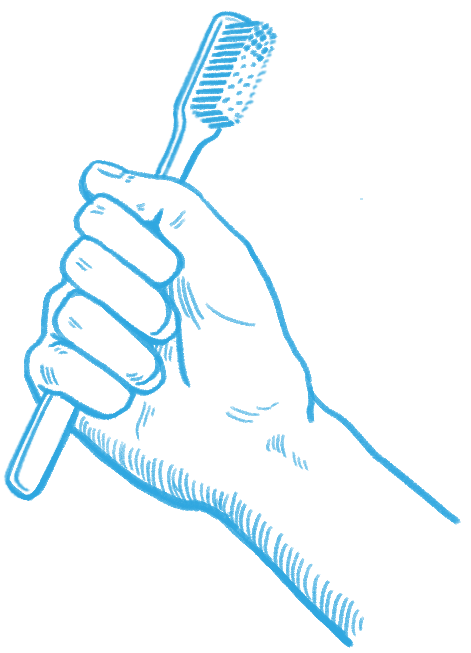 Even though Caleb is only 1 year and 3 months after the nerve transfer and still has a long way to go, he is already happy with the improvements. “Going from zero movement in my fingers to now, it’s kind of huge”. The first big impact the nerve transfers had in Caleb’s day-to-day life was probably around four months in, when he was able to open his hand to grab his toothbrush without any kind of assistance. He can now grab a toothbrush or pop can and hold on to it without a problem. His triceps progress has been harder to pin down. There is some movement in his left arm and a small amount in his right arm but he wonders if that would have come back naturally after SCI regardless of the nerve transfers. Whether or not the improvements came from the nerve transfers or from natural recovery, it has been a big help for Caleb’s mobility and being able to shift and transfer.


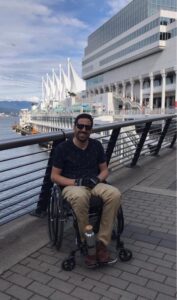 Age: 37
.jpg)